Monday 19 November 2012

Another brick in another wall

Now that the front yard is done, it's time for our landscaper to start on the back yard ... yay soon to be no more sand!!

We tidied up the yard a bit and tried to work out whether we wanted curbing or actual blocks and decided on blocks to make it easier to take care of the edges.  Once that decision was made, it was straight into the clearing and construction:
The alfresco corner
Across the back fence

Down the side to the garage


Saturday 10 November 2012

Painting games ..

or more accurately, painting the games room.

Now that the tiles are finished and we have painstakingly sealed the grout to avoid it turning to (a) crap (colour) too quickly, it's time to put some colour on the walls.

Colour can be interpreted oh so many ways, especially in this house, as I'm surrounded by males who really don't understand that there is a difference between beige, taupe and tan.  Then when they start throwing in random words thinking they might be paint colour names, I usually throw up my hands in despair and run off to Bunnings by myself.

Luckily, Peter has realised that his life runs much more smoothly if he defers to me on colour choices (the majority of the time anyway) and it's only taken nearly 20 years of marriage .. lol!

I chose the same neutral colour that we had in the last house, as he seemed to like it (Well, I didn't get any negative comments so I think that means he likes it).  It's another Taubman's colour called Athena and once again, we went half strength.

I rollered all the super-stinky primer on one day and left the whole room open all night to let the stench escape before going back in the next day to paint.  One day is definitely not enough to get rid of the stench .. might try two days next time I paint anything.

Anyway .. here's the finished product:


Luckily, there weren't any major spills on the new tiles.  All we have to do now is put the curtains back up and move the furnitutre back in.  We'll get around to buying some decent furniture eventually but for now the boys are abusing using a couple of futon lounges .. perfect for getting their sloth impersonations down pat!

Wednesday 17 October 2012

Aaannnd ... they're done!

I thought I had more photos than this but they've disappeared into the ether (either that or I've forgotten to take them off the camera which has grown legs and walked away to hide ...)
^the family room which is echoing like anything at the moment!^

^the games room^
 
It's amazing how big the rooms seem with no furniture but man are they loud!! Can't wait to get everything back in but I have to seal the grout first .. trying to make this grout stay the same colour for at least a couple of months.

Monday 15 October 2012

The Wall ... continued

The wall is coming along nicely despite our landscaper having slightly overbooked himself and rushing off to finish a few other little jobs.

Some progress shots:


And here's where we're he's up to at the end of today's efforts:


Next step ... is the steps!  Woohoo!!

Saturday 13 October 2012

The Office

Not the TV show .. our home office.

I promised some pictures of after the painting so here we go.  I cannot believe how much 'stuff' we have in here already and there's still several boxes of Peter's extra office stuff to be unpacked .. looks like they're staying packed up for quite a while longer 'cos there's no room!


Friday 12 October 2012

Tiles .. more progress!

^ the kitchen^

^Andrew's leg photobombing the boys' hallway^

^the pantry^

^the games room^

Tuesday 9 October 2012

Channelling Pink Floyd in the front yard ...

... "all in all, you're it's just a - nother brick in the wall".

As shown in a previous post, we had decided to have the front retaining wall built out of leftover house bricks to use them up and try to save a bit of money on materials.

After wasting 6 weeks trying to find a bricklayer who would
  1. actually answer their phone
  2. agree to come out and give me a quote
  3. actually turn up at said appointment time all
  4. be able to do the retaining wall job sometime before Armageddon
... I finally gave up and called a couple of landscapers.

Then after going through almost the exact same process over two weeks this time, I found a young bloke who has just moved into our estate, turned up exactly when he said he would and gave us a reasonable quote, so I grabbed him with both hands (not literally!) and gave him the job.

Before he could start, Peter had the unenviable job of removing the last dodgy contractor's handiwork from the path to the front door.  It wasn't done properly to start with and the guys disappeared of the face of the earth after doing it so we Peter got out his pneumatic thingumajig and tried to break up the concrete.  Twenty minutes later he annouced he was going out to the local hire shop to get, quote "a proper jack hammer" unquote as his one wasn't big enough to do the job (so many jokes .. so little time!).  This is the end result of his venting his manly frustrations on temporarily unyielding concrete:

The landscaper started the front yard today and we've already run into a few issues.  I wanted to have the wall run across the middle of the yard to make it two levels (just to add a bit of visual interest), but when they started digging for the foundations, they found the stormwater pipe, electrical pipe and to top it all off, the phone cable running right through at the wrong heights.  As he explained it to me, I could have the wall where I wanted it but I'd just have all those pipes sticking straight out the front of my nice new wall.

I pouted and sulked and whinged and whined but eventually accepted that the wall would have to go right on the footpath boundary ... waaaah!  I do believe I heard the words "suck it up princess"  more than once from my darling husband, but chose to ignore him for his own safety.

Once that decision was totally taken out of my hands accepted, they got stuck in and here's where they're up to at the end of the first day:

Looking good so far ...

Thursday 4 October 2012

Tiles, tiles, tiles!

After 8 long months in the house, we finally have enough money to get the tiles laid ... woohoo!!

The idea (this time around) was for Peter and the boys to go up to the shed and I would stay home and seal/undercoat/paint while the tiler was working.  Ba-bow!  Of course, something had to change our plans but luckily this time it was something good.  Peter got a permanent job which meant his roster changed, which meant he would be flying out when he was supposed to be flying in.

Sooo .. long story short (I know .. too late!) I didn't get to paint before the tiler started but look at what he's done so far:

Purdy!!

 
One day down .. another 12 or so to go ....

Friday 24 August 2012

I love the smell of paint in the morning ...

The oil-based undercoat sealer/primer .. not so much.  That stuff stinks so much I'm sure we could have sold tickets to those wanting to get high!!

Trouble is, because we have brand new plaster that has never been painted before, all the painting places recommend using the oil based sealer to prevent the plaster sucking the water out of water based paint, resulting in the paint peeling off in sheets a short time after being put on.  Or something like that anyway .. I kind of tuned out once I had my first whiff of the sealer!

We are hoping to get the tiles done soon and the original plan was to tile the office as well.  In the last house, we had pillow top tiles (slightly domed finish) and the edges of the tiles and the grout lines were a fair bit lower than the centre of the tile.  Due to the profile of those tiles, the finish on the tiles was totally ruined by the office chairs rolling into and out of the grout lines.  We didn't want that to happen again as we're planning on being here a while, so we decided to buy a piece of vinyl flooring and put chair mats down instead of tiling.

(The fact that we had nowhere to put all of the furniture while everything was being tiled may have contributed to this decision too!)

Once the decision was made to bring all of the office furniture into the office, we thought it might be a good idea to paint the room first so we didn't have to move it all out again in the near future.

Peter put the sealer on while I was at work and I'm sure I could smell it from the corner of our street when I was coming home ... it's that strong!  We waited a couple of days for the smell to die down a bit before painting. 

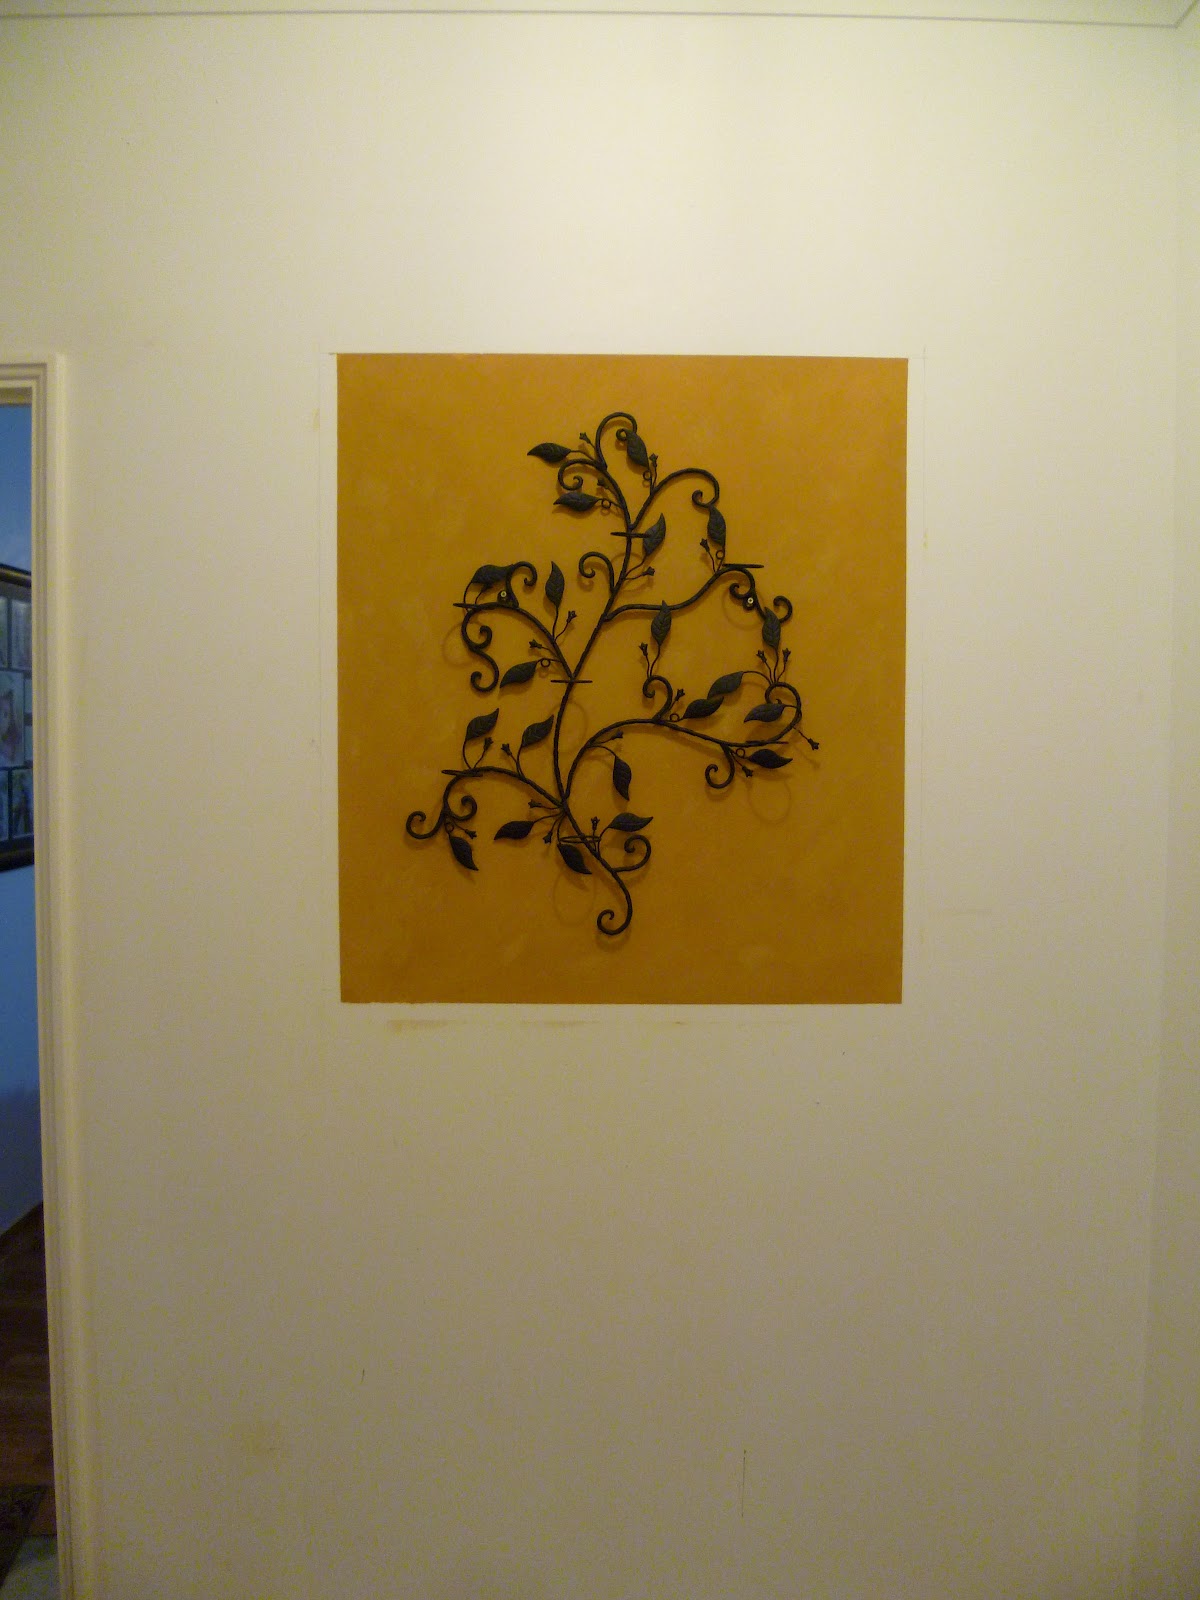
Luckily, we actually agreed on a colour for a change.  It's called Taubmans Sheer Hose but we got it in half strength as the office is on the south side of the house and doesn't get any direct sunlight, so I thought the full-strength version would be way too dark.

As is typical, as soon as I started the cutting in process, I freaked out that I had chosen a colour that was way too dark/purple/brown/gross/etc, just because I'm so used to staring at bright white plaster walls.  Once Peter started the rollering, it didn't seem so bad after all and now I'm even thinking of painting the ensuite and toilet in the same colour.

I couldn't find the camera, so the only pictures are ones that I took with my dinosaur of a mobile phone:
 
 
It's one of those paint colours that looks completely different at different times of the day and now that I've realised that, I like it.  I haven't got any photos of the finished room yet but I'll try to get on that soon.

Thursday 19 July 2012

Backyard progress ... sort of!

We haven't managed to put in any gardens yet but I just had to get outside and do some 'gardening' last weekend. 

It all started when our new dog (Xena, a stray who adopted us .. not the other way round) decided to dig a hole down the laundry side of the house with her 'cone of shame' (that she was wearing after being spayed).  This resulted in Brutus getting under the fence and ending up in the neighbour's backyard playing with her dog, Stella. 

Realising that if little tiny Xena could dig a big enough hole for Brutus to get under the fence, then she would be able to get under there too, we decided to put some sort of barrier along the bottom of the colorbond fence.  (The fact that my sister's puppy, Brando, was coming to stay the following weekend may have been a factor too ... definitely couldn't let him get out .. I can't run fast enough to catch him!)

I found some leftover old conveyor belting at work that I thought might work, so I brought it home.  I figured it was tough enough to withstand being chewed and scratched a bit but not too sharp or hard that it would hurt the dogs.  Peter and the boys attached it to the bottom of the fence and it's working a treat so far.

Only problem was that once I had mostly levelled out the laundry side, I just kept going around the back and then down most of the other side.  The boys weren't very impressed as they were roped in to help but I let them off after about three hours!

Here's the roughly levelled out laundry side before the conveyor belting went on the fence:

 
This is the rough layout of where I want the garden beds to go along the back of the house (the bricks along the left side represent the edging) and where the screen(s) are going to go to block the view of the clothesline and what will eventually be some sort of overflow garden storage area (by the pile of bricks in the background).  The rest will be lawn with a small garden bed under the window to shade it in summer time:


I would like this to be a planter box the same height as the (orange) retaining wall so I can plant this tipuana tree in it to shade the alfresco in summer.  Tipuanas are deciduous so it will allow the sun in during winter .. just don't tell Pete it will drop all it's leaves every year or he'll probably try to kill it!


We are still trying to decide what to do down the living area side of the house.  Peter wants to pave the area just outside the roller door so we can park the trailer there, but we have enough space for it to live out the front so I'm trying to talk him out of bringing it out the back.  There will be garden beds along the fence but none next to the house ... at this stage ... as the rest will be lawn to reduce the reflected heat:


Now for some time and money to finish it off ...

Sunday 22 April 2012

Decisions, decisions

Even though landscaping for the front yard was included in the price of the land, any hardscaping (retaining walls etc) had to be completed by us before the landscapers would even come out to look at the front yard. 

So we have been out the front to try and decide what we're going to do ... leave it sloping and try to get a lawn to grow or put in a retaining wall with the hundreds of spare bricks and just have garden with no lawn.

Most of the other houses on our side of the street have some sort of retaining wall .. usually limestone blocks which Pete doesn't like ... and the few that don't have walls, have mostly lawn that isn't looking the best.  The lawn not looking good could be due to many factors:  not being gardeners, not enough water, no fertiliser, or just the fact that the estate's landscapers put roll-on lawn straight on top of whatever sand is out the front with no preparation/wetting agent/compost/soil improver. 

Enough whingeing about the 'landscapers' ... if we can call them that .. they're just installers as they don't seem to have any idea about how to make plants/lawn grow.

We brought some of the bricks out to the front to try and work out what sort of wall we would like to have built and managed to decide on the following layout:


The gap is for the front steps I want .  I've always disliked having to walk up the driveway to get to the front door so I'm finally going to get steps .. woohoo!

 Mind you, this is the third time we've changed our minds so far so it may end up being different again in a week's time!

Wednesday 21 March 2012

The decorator touch ...

Well, not quite a decorator's touch but I thought it was about time we did something to the front entry hall so I wouldn't have to stare at the blank wall every time I walked in.

Peter and the boys gave me a lovely wrought iron look candle holder for Christmas 2010 which I always had full intentions of putting up in pride of place somewhere in the new house.

The original plan for the front hall was a very big family portrait taken outside in some sort of natural setting with everyone in jeans and T-shirts but as we don't seem to be a very photogenic family (in other words, I hate photos of me and include everyone else in that to make myself feel better!), we decide to put the candle holder up instead.

First, I taped off an area on the wall using painter's tape to see how big of an area it would need and to see whether I actually liked it in that particular spot.

Then it was off to Bunnings to try and decide on a paint colour for the background.  I was leaning towards a green or blue, but Peter reckoned we already had enough of both of those and wanted a bright yellow.  This was the compromise:


A textured paint called toffee... can't remember the brand .. think it's Walpamur. (I still think it looks like baby poo yellow but I'm getting used to it).


I had originally wanted a giant picture frame with the glass removed to be attached to the wall to 'frame' the candle holder but it was very difficult to find one big enough that had the right dimensions.  We ended up buying some moulding from Bunnings, painting it matt black and just nailing it to the wall.


This is probably the truest version of the colour .. my photography/white balance skills aren't good at all.  The whole thing turned out pretty well thanks to my darling hubby's handy skills (and my patching abilities ... sssh!!)

 The background colour may change.  I promised I would give it a while to get used to it but we'll see ... stay tuned!

Saturday 3 March 2012

Woohoo .. we have air con!!

Thanks to my darling mum, we now have ducted reverse cycle air conditioning through the whole house.

After a lot of investigation, I gave Peter a couple of different options and togeether we decided on a system that had the ability to set and maintain a different temperature in each room.  It was advetised as having 'no dump zone' which was a big selling point for me as it meant that there wouldn't be a zone that was on constantly even when not required.

The ceiling vents are the same as those used for evaporative air con which surprised me as I thought refrigerative air con needed different outlets.  Turns out it doesn't .. learn something new all the time.


The compressor unit was put outside our ensuite window to avoid any of the other bedrooms having to put up with the noise.  It's not actually very noisy but we weren't sure and thought better safe than listening to the whingeing!

It's been in for a couple of weeks now and it works well.  I'm a bit scared of what the power bills will be like but we'll just have to wait and see.  Can't be worse than the first one ... $900+!!

Overall I'd say we're happy with it as it doesn't matter if it's humid or just hot, unlike evaporative which only works well in hot, dry weather.

One of the only things I'm not happy with is that I like to feel a breeze .. it makes me feel cooler .. and this system doesn't push that much air through to make a breeze.  It just feels cooler in the room which you notice when you first walk in but after a while, I find I have to turn a fan on to get the air circulating.

The other thing is that although the system was advertised as having 'no dump zone', it actually does have one but they have just called it soemthing different .. pressure relief or something like that.  What that means is that the boys's hallway, which never gets hot due to having no direct sunlight and being on the south side of the house, now gets all the 'excess air' produced when the system is trying to cool any other area.  This makes it colder than the rest of the house with the boys' rooms being even colder than they should be. 

I'm going to try to get the dump zone moved to the front hallway, where it would be better placed but I don't know if they can move it that far from the main unit in the ceiling space and then we'd have to patch the ceiling as well.

On the positive side, at least we have air con!!

Friday 27 January 2012

An inside update ..

Well we've been here two months and this is what the family room looks like ...


the dining room:


the kitchen:


and worst of all, the home theatre/lounge room:


Must get on to that when I find some spare time ....

Friday 20 January 2012

Yay! No more hurdles just to get in the front door!

For those who haven't visited the house, this won't make any sense whatsoever.  For those who have, like me, nearly fallen flat on their faces trying to hurdle the toddler stairgate across our front doorway (to keep the dog in), this will be welcome news!

We finally have our crimsafe, clearview security door.  The other added bonus is that I won't be battling the millions of bugs that see the open front door as an open invitation to move in with us every time I try to encourage the beautiful breeze inside to remove some of the trapped heat.  Woohoo .. I'm off the menu for the mozzies!!

Isn't she purdy???

Tuesday 3 January 2012

Wardrobe fitout

When we re-arranged the floor plan of the house, we I sacrificed part of the WIR in the master bedroom to make a cupboard/storeroom for Pete and the boys' biking paraphernalia.

As Peter hadn't quite decided how he wanted it set up (and the fact that it would have cost quite a bit extra to set it up the way he thought he wanted), we left it empty with no shelving or rails. 

We also had grand plans for inside the WIR involving built in drawers, shelves and multi height hanging rails that we were going to purchase from Bunnings and install ourselves.  Then reality intervened with the rapid dwindling of available funds, so that plan disappeared as quickly as chocolate does around a woman with PMT me.

As a result, when we moved in, all of my and Peter's clothes on hangers ended up in the guest bedroom, halfway to the other end of the house, which wasn't all that practical when you realise after you step out of the shower that you forgot to gather all your clothes before getting naked. 

In other words, in order to not permanently scar the children's psyches for life by seeing me running from one end of the house to the other while sort of wrapped in a towel, I hassled asked Peter nicely to get on to fixing the issue.

And, bless his little cotton explorer work socks, he did!

Storeroom before


Storeroom after


WIR before. 
(Forgive the angle .. this shot was of the tiles but you get the idea.)


WIR during: My side


WIR during:  Peter's side


WIR after:  My side ... with hangers!  Woohoo!!


WIR after:  Pete's side .. if you couldn't work it out!


There's still a few minor details to finish off like the trim on the edges, the shelves in the storeroom and the double hanging rail in the WIR but for now he's done a good job. 


I think I'll keep him a while longer, despite the silly faces he pulls in photos ... he's pretty handy around the house when he wants to be!